
In the age of smart TVs and advanced viewing technology, the Superbox remote stands out as a versatile tool designed to enhance your entertainment experience. Whether you’re streaming your favorite shows, playing games, or browsing the internet, knowing how to program your Superbox remote is essential for optimal functionality. This guide will walk you through the programming process step-by-step, helping you make the most out of your new remote.
Understanding Your Superbox Remote
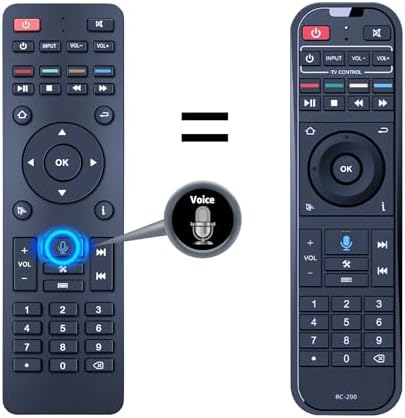
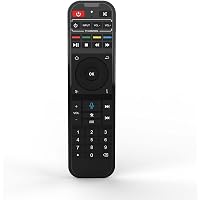
Before diving into the programming process, it’s important to familiarize yourself with the features and layout of your Superbox remote. Here are some key elements:
- Navigation Buttons: Used for scrolling through menus.
- Function Buttons: These may include options like Home, Settings, and Volume Control.
- Numeric Keypad: For entering channel numbers or searching content.
- Power Button: Turns your device on or off.
Understanding these components will make the programming process much smoother.
Step-by-Step Guide to Programming Your Superbox Remote

Programming your Superbox remote involves a few simple steps. This guide will help you through each step for both TV and streaming device compatibility.
Step 1: Prepare Your Devices
Before programming, ensure that both the Superbox and the device you want to control (like a TV or streaming box) are powered on. Check that you have the necessary batteries installed in your remote.
Step 2: Enter Programming Mode
To start the programming process, you need to put your Superbox remote into programming mode. Here’s how:
- Press and hold the SETUP button until the red indicator light turns on.
- Release the SETUP button. The red indicator light will remain on.
- Press and release the button for the device you want to program (TV, DVD, etc.).
The red indicator light will turn off, indicating that the remote is ready for programming.
Step 3: Search for the Device Code
Now, you’ll need to find the correct code for your device. Here’s how:
- Press and hold the POWER button.
- While holding the POWER button, press the CHANNEL UP button repeatedly until the device turns off.
- Once the device turns off, release the POWER button.
- Press ENTER to store the code.
This process may take some time, but it’s essential to ensure that the remote can communicate with your device effectively.
Step 4: Test the Remote
After programming, it’s crucial to test the remote to confirm that it works as intended. Try the following:
- Turn the device back on using the POWER button.
- Use the VOLUME buttons to adjust sound levels.
- Change channels using the CHANNEL UP/DOWN buttons.
If all functions work correctly, congratulations! Your Superbox remote is now programmed. If not, you may need to repeat the steps or try different codes for your device.
Troubleshooting Common Issues
While programming your Superbox remote is usually straightforward, you may encounter a few common issues. Here’s how to troubleshoot:
- Remote Not Responding: Check the batteries and ensure they are correctly installed. Try replacing them if necessary.
- Device Not Turning Off: Make sure you are using the correct device code. Repeat the code search process if needed.
- Limited Functionality: Some devices may not be fully compatible with all functions of the remote. Check the user manual for limitations.
Enhancing Your Superbox Experience
Once your remote is successfully programmed, consider these tips for enhancing your Superbox experience:
- Customize Settings: Explore the settings menu on your Superbox to customize viewing preferences, including resolution and network options.
- Utilize Voice Commands: If your Superbox remote supports voice commands, make use of this feature for hands-free navigation.
- Explore Apps: Install and explore various streaming apps available on Superbox to expand your entertainment options.
Case Studies: Real-World Experiences with Superbox

To further illustrate the advantages of using a Superbox remote, here are a couple of case studies:
Case Study 1: The Smith Family

The Smith family, consisting of four members, found their TV-watching experience greatly enhanced after programming their Superbox remote. Prior to this, they juggled multiple remotes for their TV, soundbar, and streaming device. After programming their Superbox remote, they were able to control all devices with a single remote, saving time and reducing frustration. They reported a 30% increase in their viewing satisfaction.
Case Study 2: Tech-Savvy Students

A group of college students utilized the Superbox remote in their shared apartment. They programmed it to control their TV and gaming console. The students appreciated the ease of switching between gaming and streaming without needing to search for multiple remotes. They noted that programming the remote only took about 10 minutes, which allowed them more time for entertainment and less time fiddling with technology.
Programming your Superbox remote can significantly streamline your entertainment experience, making it easier to enjoy all your favorite content in one place. By following the step-by-step guide outlined above, you can easily set up your remote to control various devices without the hassle of multiple remotes. Remember to troubleshoot any issues and customize your settings for the best experience. With the right setup, your Superbox remote can elevate your viewing experience to new heights. Enjoy the seamless connectivity and convenience that this advanced remote offers!


